

Hi friends! I’m so excited to share the November 2025 Club Kits from The Stamps of Life and the cards I created using them!
This month’s Stamp Club set is called All Bundled Up, and it features the cutest winter animals — a moose, a raccoon, and a penguin — all dressed in cozy scarves, hats, and jackets! There are also several fun winter sentiments, including “Warm Wishes,” “Have a Chill Day,” and “Stay Pawsitive.”
If you’re part of the Die Hard Club, you’ll also receive the coordinating dies, which make it so easy to cut out the animals.


The So Thoughtful Card Kit coordinates perfectly with the club sets! It’s filled with cheerful patterned papers, ribbons, and embellishments that bring these playful animals to life.
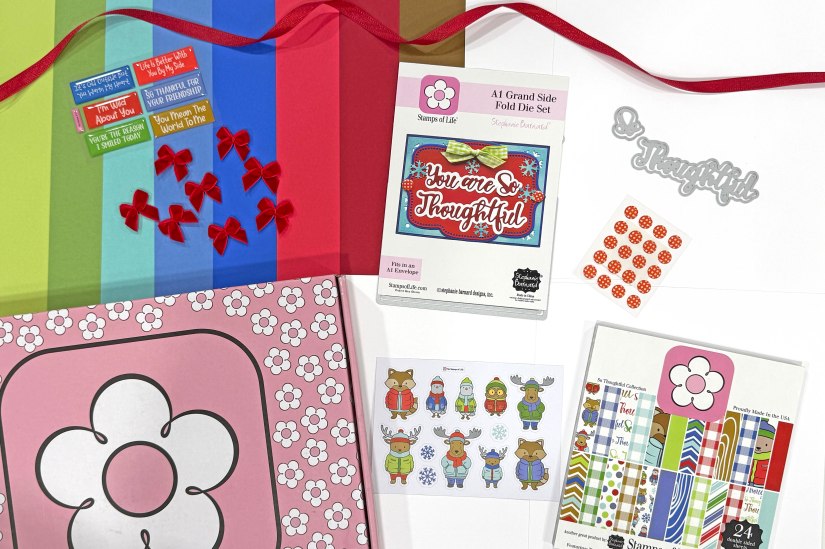
The card kit includes 12 pieces of 8 1/2″ x 11″ cardstock, A2 envelopes, plastic storage envelope, paper pad, animal stickers, sentiment stickers, epoxy dots, red ribbon, red bows, “So Thoughtful” word die, and an A1 Grand Side Fold Die Set.
There are lots of perks to being a club member.
- Earn club points to spend in the store
- Receive 15 percent off discount on everything in the store (a 20 percent discount for card kit members)
- Receive a $15 gift certificate on your club anniversary ($25 for card kit members)
- and more!
To find out more about The Stamps of Life clubs, click here.
My favorite club of all is the Gold Club which consists of the Die Hard Club and Card Kit Club.
I am a Stamps of Life club affiliate so if you decide to join a Stamps of Life club or upgrade your current membership, I always appreciate when you click on my link as I will receive a small commission at no extra cost to you. You can find my Stamps of Life club affiliate link here. As a bonus, you will receive 500 Club Points (a $5.00 value) if you use my affiliate link or if you enter my Promo Code when you sign up for one of the TSOL clubs. My promo code is LISAMEARS. As always, I appreciate your support!
If you would like to see the club contents up close and how I made all of my cards, then watch my video on YouTube or below.
I’m excited to share four cards I made using the club products this month.

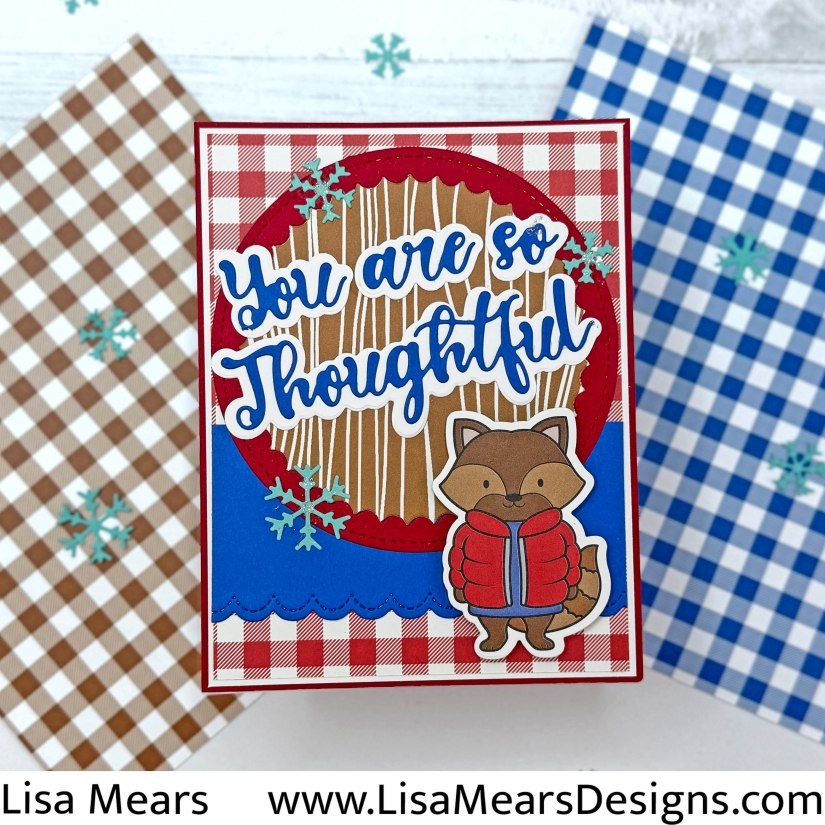
Card 1


- A1 Grand Side Fold Die Set
- Cardstock: Powdered Sugar, Strawberry, Pacific
- Scrapbook.com Nested Oval Dies
- Scrapbook.com Pops of Color, Silver Glitter (added to snowflakes)
Card 2
- White A2 Card Base – 4 1/4″ x 5 1/2″
- Cranberry Cardstock – 4 1/4″ x 5 1/2″
- White Cardstock – 4 1/8″ x 5 3/8″
- Red/White Pattern Paper – 4″ x 5 1/4″
- Blueberry Cardstock – 4″ x 2″ (cut Pretty Pink Posh Stitched Border Dies 1 from the bottom of the 4″ side)
- Pretty Pink Posh Scallop Circle Dies – cut with Cranberry Cardstock and Woodgrain Pattern Paper)
- Sentiment – White and Blue Cardstock
- Snowflakes (cut Seaglass cardstock from A1 Grand Side Fold Die Set)
- Scrapbook.com Pops of Color, Silver Glitter (added to snowflakes)
Card 3

- White A2 Card Base – 5 1/2″ x 4 1/4″
- A1 Grand Side Fold Die Set
- Die-cut the snowflake background from Seaglass cardstock.
- Die-cut the rectangle twice from white cardstock — one for layering behind the snowflake background and one to create the snowy hills at the bottom.
- Strawberry Cardstock – 4 7/8″ x 3 1/2″ (layer behind snowflake background)
- Seaglass/White Gingham Pattern Paper – 5 3/8″ x 4 1/2″
- Strawberry Cardstock – 5 1/2″ x 4 1/4″ (layer behind Seaglass/White gingham pattern paper)
Card 4
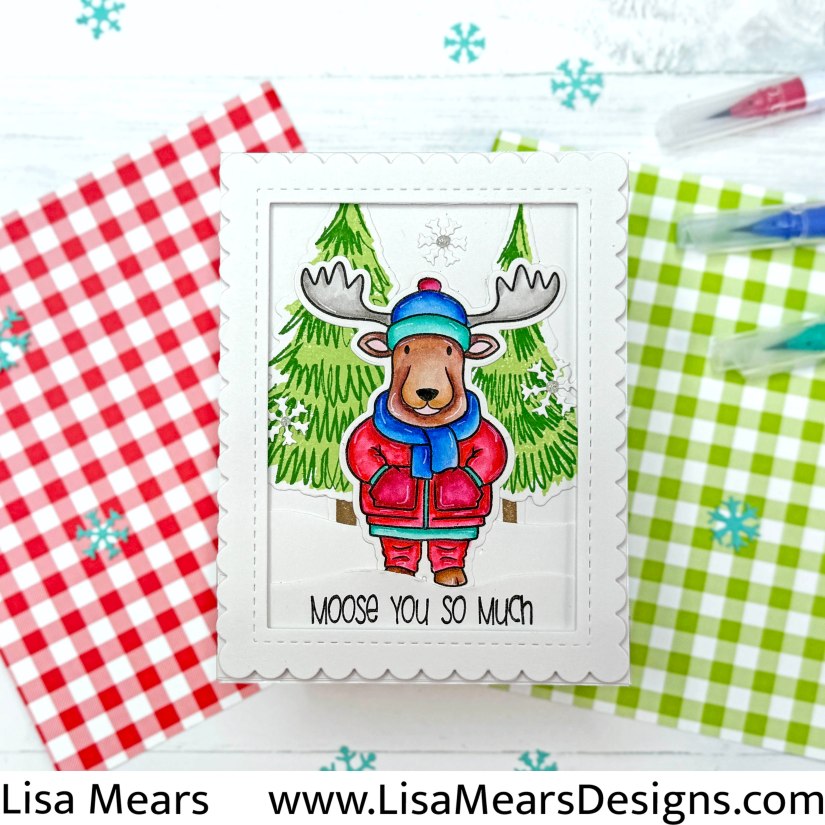
- White A2 Card Base – 4 1/4″ x 5 1/2″
- Scrapbook.com Christmas Trees Stamp and Dies
- Stamp Christmas Trees on Bristol Smooth Cardstock with Catherine Pooler Garden Party and Grass Skirt ink.
- Stamp Tree barks with SBC Leather Ink
- Scrapbook.com Nested Stitched Scallop Frame Dies (Cut largest die with white cardstock)
- White Cardstock – Cut two pieces to 4 1/4″ x 5 1/2″.
- Use one piece for the background.
- From the second piece, cut two snowy hills and adhere them to the bottom of the background panel.
- Scrapbook.com Pops of Color, Silver Glitter (added to snowflakes)
- Bristol Smooth Cardstock (stamp)
- Versafine Onyx Black Ink
- Zig Clean Color Real Brush Markers
- True Blue, Blue, Wine Red, Red, Beige, Mocha Brown, Warm Gray 3, Turquoise Green, Pink Haze, Black Blender
- Zig Clean Color Real Brush Blender Marker
- Need a blank swatch chart for your Zig markers? Click HERE
Once again, if you would like to see how I made all of my cards, be sure to watch my video on YouTube.
Thank you for stopping by today. Have a great day!
Lisa
Follow me for more inspiration:
- Blog – https://lisameardesigns.com/
- Instagram – LisaMearsDesigns
- Facebook – Lisa Mears Designs
- Pinterest – https://www.pinterest.com/lisamearsdesigns/
- You Tube – https://www.youtube.com/c/LisaMearsDesigns
- Etsy (Shop Crafty Items)-https://lisamearsdesigns.etsy.com
- Etsy (My Creative Attic – Shop Personalized Gifts) – https://mycreativeatticco.etsy.com
Please support me by using my affiliate links above. When you click on on my link and make a purchase, I get a small commission of the sale at NO extra cost to you. Using my links helps me be able to bring in more content to share with you. I appreciate your support! Thank you!
