

Hello Crafty Friends.
Today I’m sharing a new product by Simon Hurley which is his brand new line of Solar Paste. I’ll show you all of the colors and five ways that you can use the solar paste to make cards.
Solar Paste a little different than Simon’s lunar paste in that the Solar Paste is a creamy white paste that when it is spread on cardstock, it turns a metallic color. It looks best on black cardstock, and will look more pastel on a white cardstock.

There are currently six colors of Solar Paste.
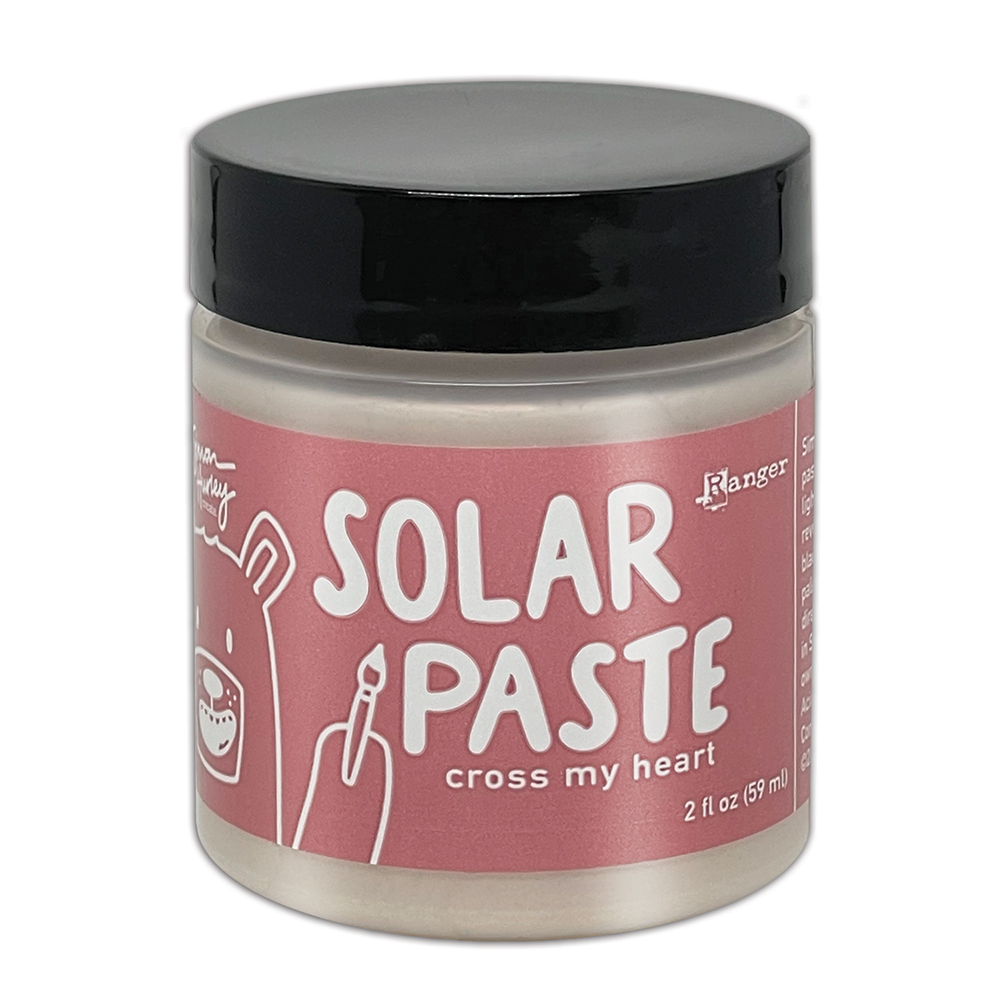
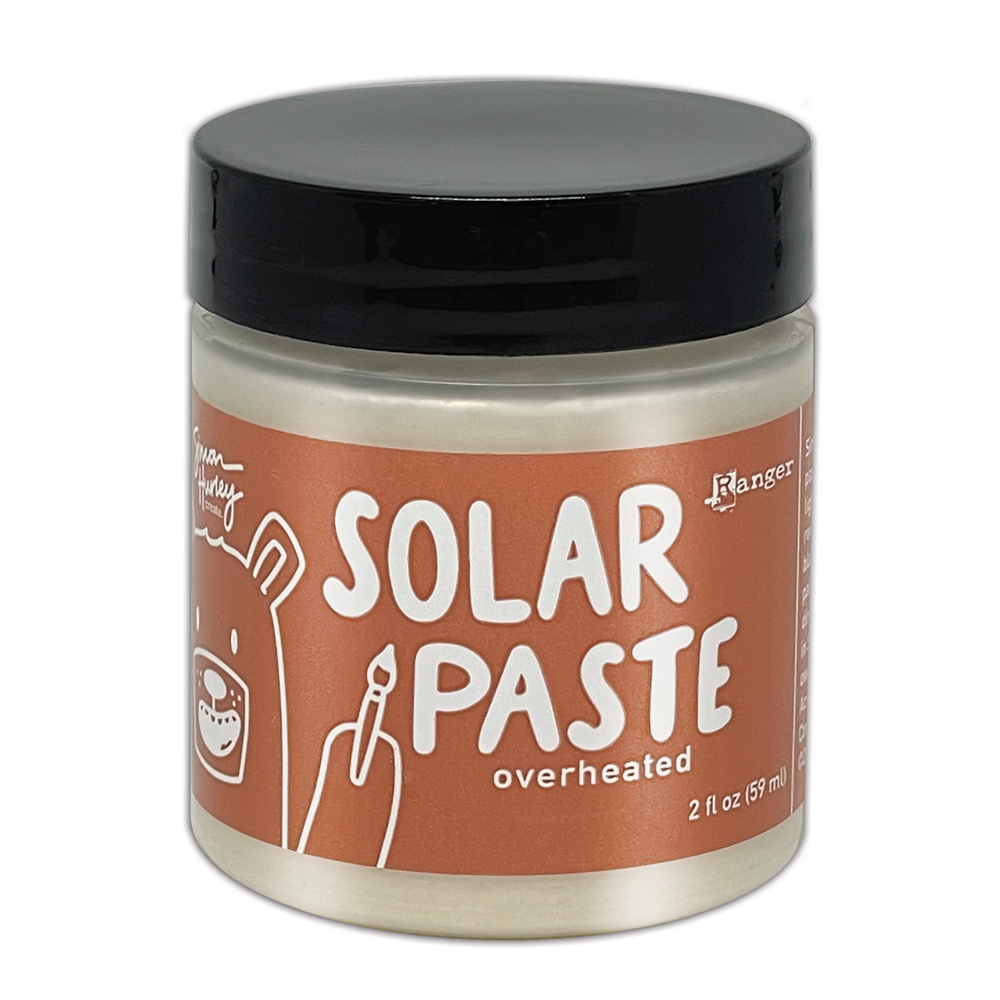


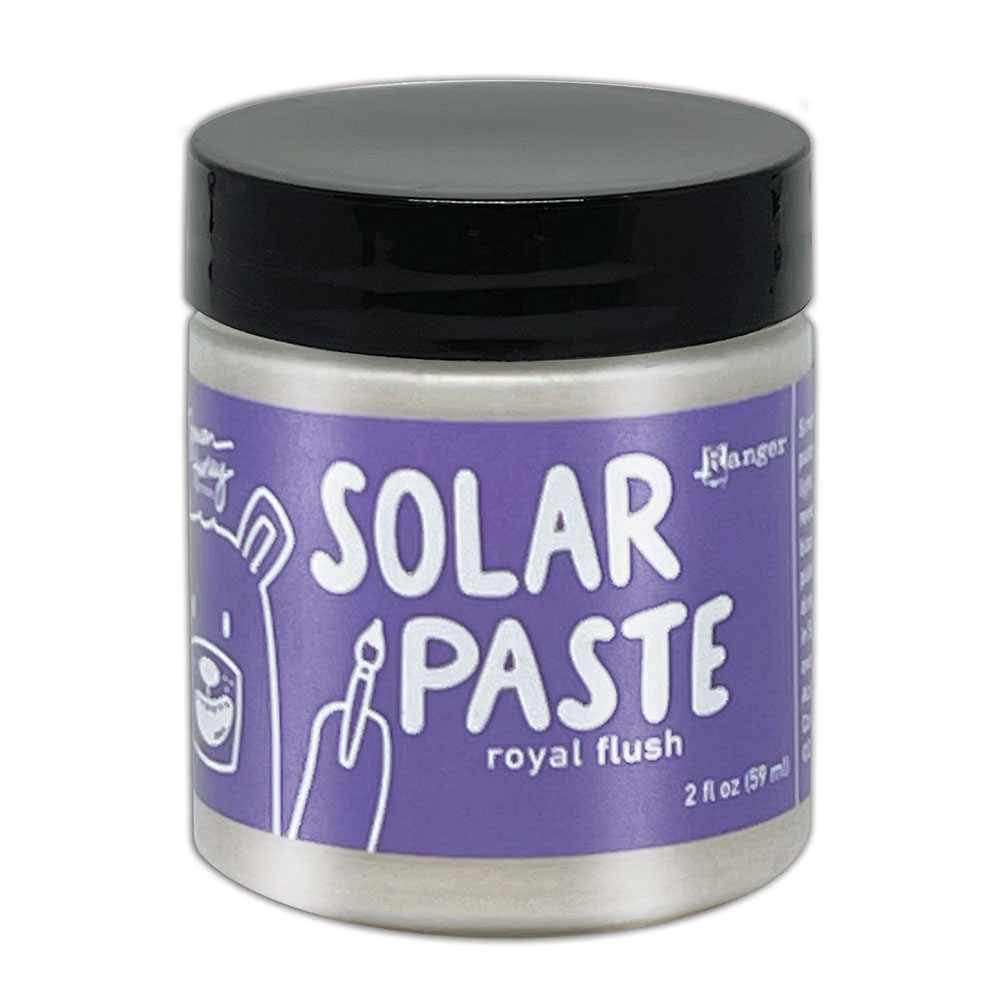
The Solar Paste can be purchased individually or as a bundle.
You can purchase the bundle HERE!
There are many ways to use the Solar Paste and in my YouTube video I’m going to show you 5 ways. If you would like to watch as I explain how to use Simon Hurley’s Solar Paste, then watch my video below or on YouTube.
Technique 1 – Use Solar Paste with Stencils
My favorite technique for using Solar Paste is to apply it to a stencil on black cardstock. For this technique, I used all six colors of Solar Paste with Scrapbook.com Fireworks Stencil.
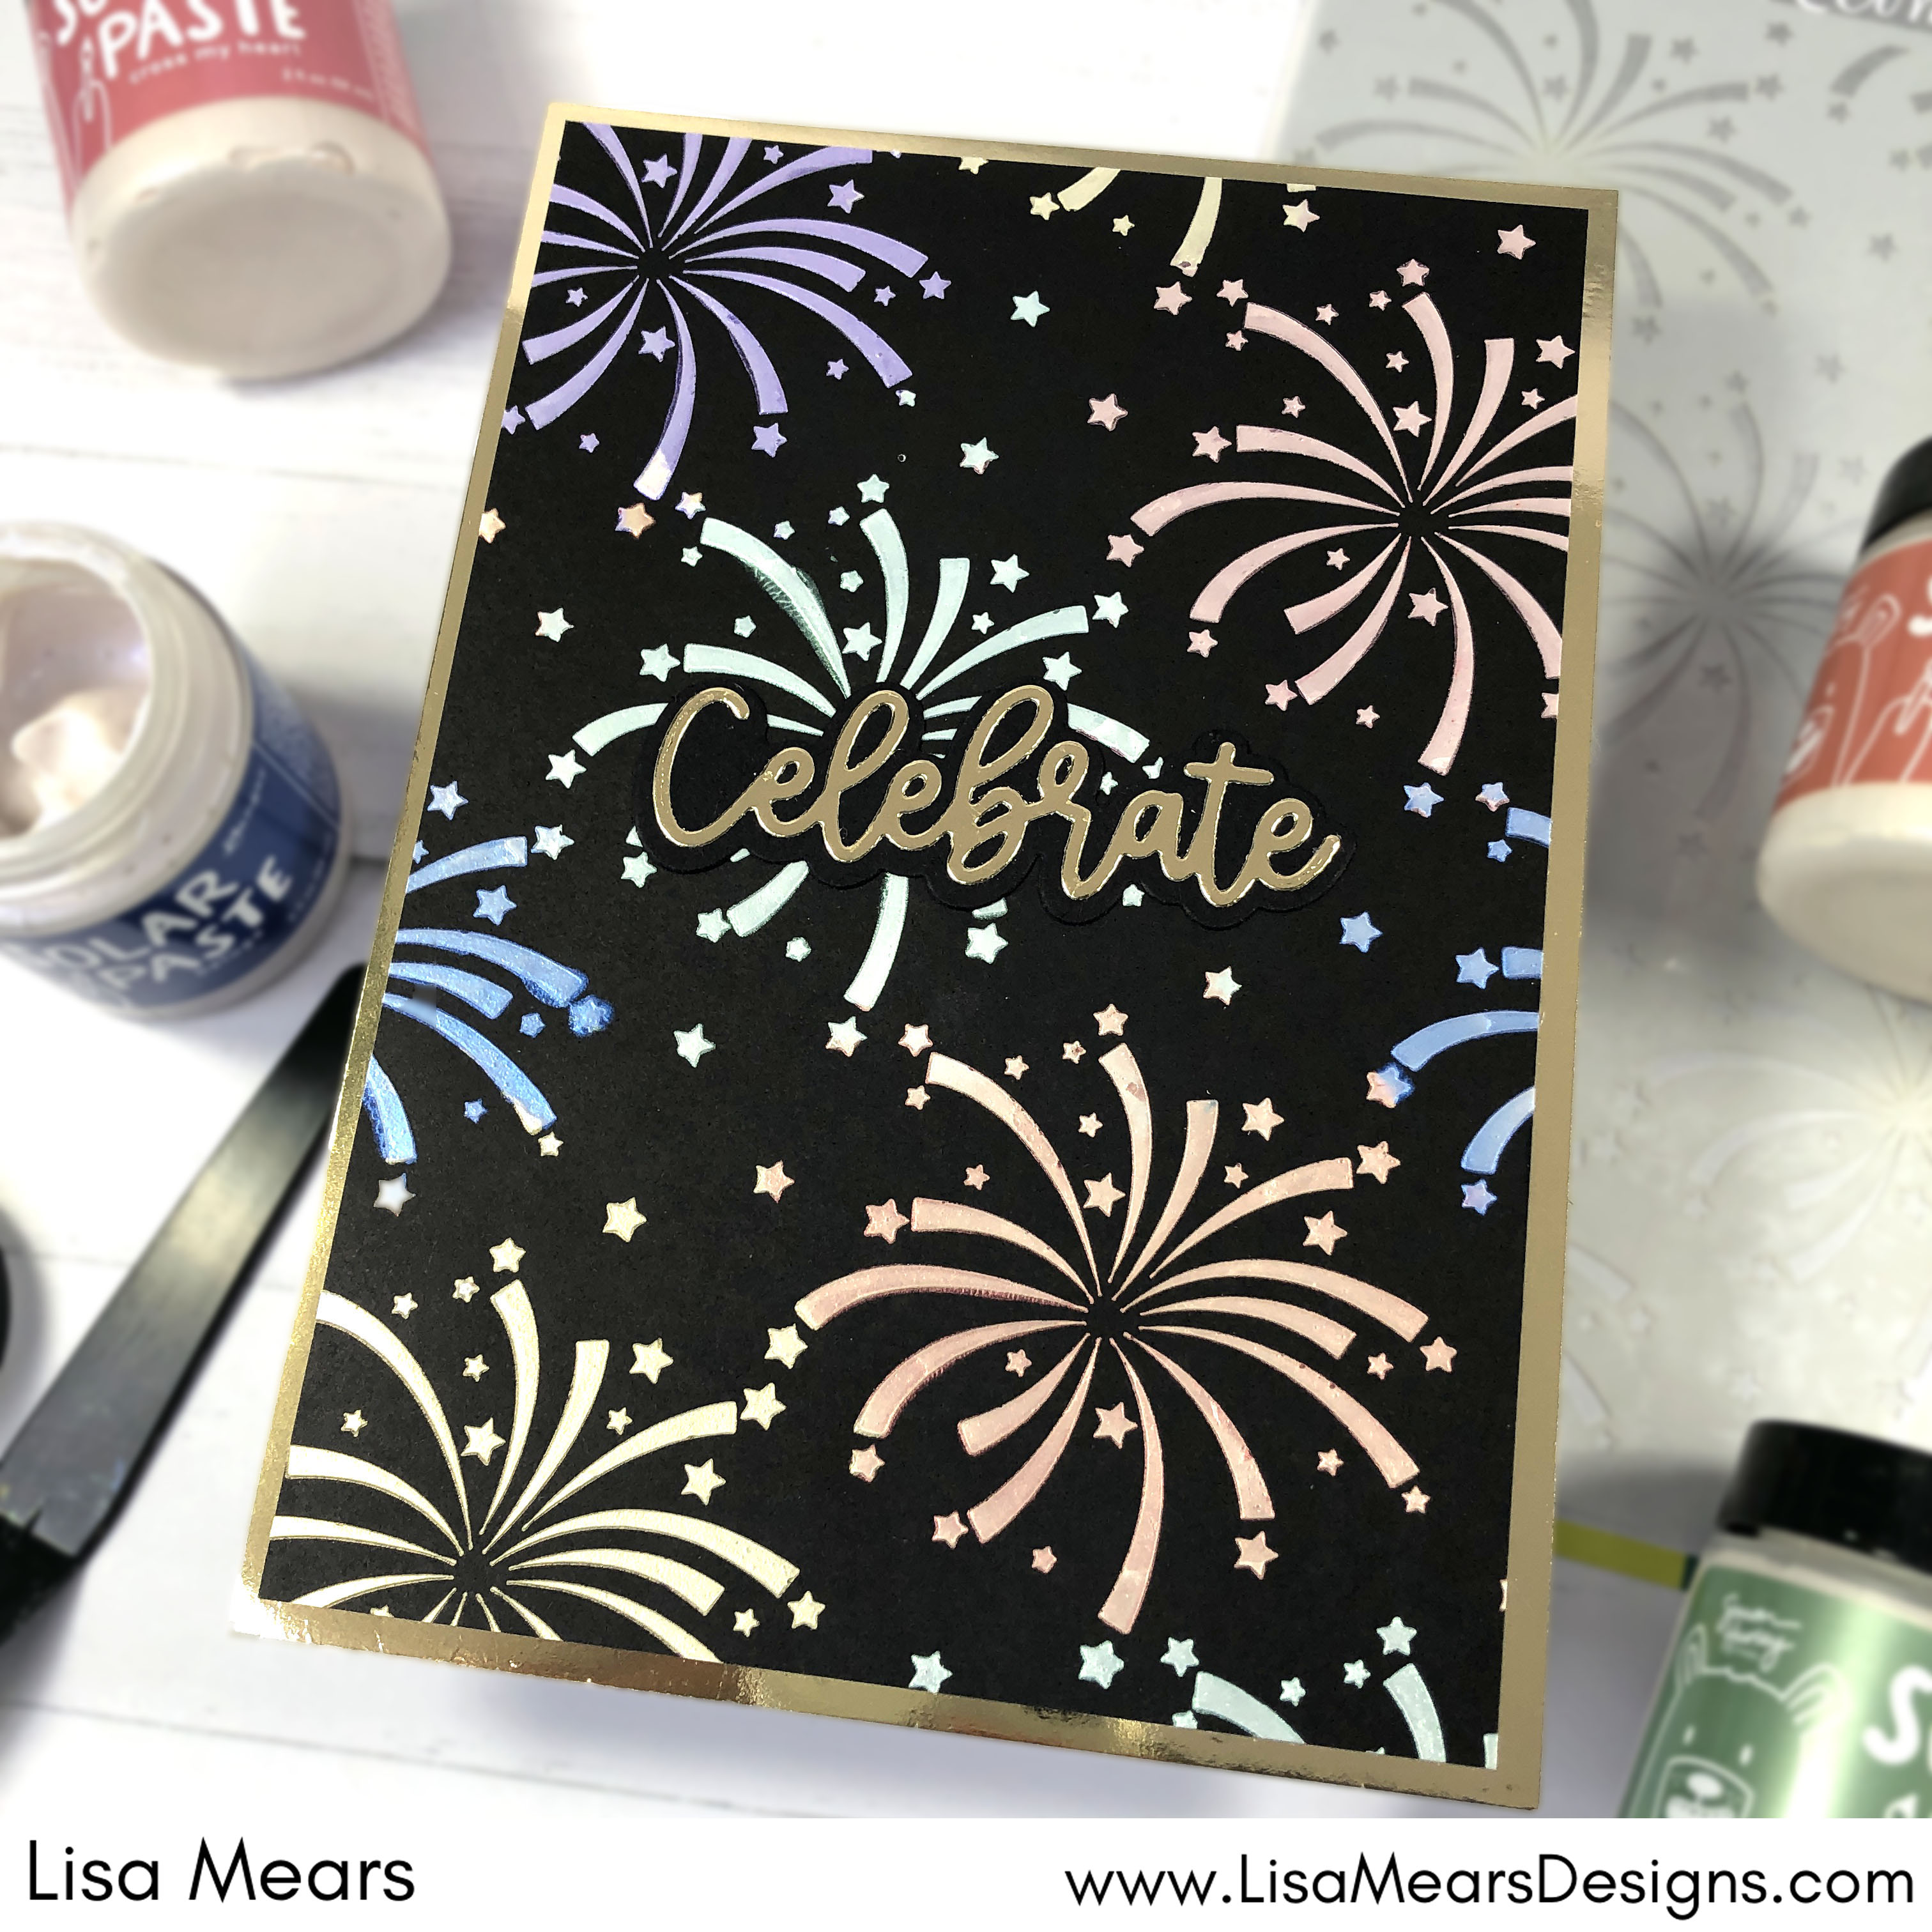
SUPPLIES USED:
- Simon Hurley Solar Paste (all colors)
- Scrapbook.com Fireworks Stencil
- Scrapbook.com Holographic Paper
- Scrapbook.com Birthday Celebrations Dies
- Spellbinders Onxy Cardstock
- Ranger Palette Knife
- Wendy Vecchi Make Art Stay-tion
Technique 2: Use Solar Paste Metallic Backgrounds for Die Cutting
For this technique, I spread the Beluga Solar Paste onto black cardstock and die cut it with the Thanks die from the Scrapbook.com Cardmaker Block Word Dies to add my sentiment.
Just like with the first technique, I used the Beluga and Golden Hour colors of Solar Paste with the Scrapbook.com Roma Mosaic Stencil for the background of my card.

SUPPLIES USED:
- Simon Hurley Solar Paste, Beluga and Golden Hour
- Scrapbook.com Roma Mosaic Stencil
- Scrapbook.com Cardmaker Block Words (Thanks)
- Scrapbook.com Pops of Color, Silver Glitter
- Spellbinders Onxy Cardstock
- Ranger Palette Knife
- Scrapbook.com All Purpose Scraper
- Wendy Vecchi Make Art Stay-tion
Technique 3 – Use Solar Paste with Embossing Folders
For this technique, I used the Spellbinders Flurry of Snowflakes embossing folder and then used the Golden Hour Solar Paste with an ink blending tool to lightly pounce the Solar Paste onto the raised snowflakes from the embossed cardstock. I added the Scrapbook.com Snowflake dies and a sentiment using the Scrapbook.com Modern alphabet dies.
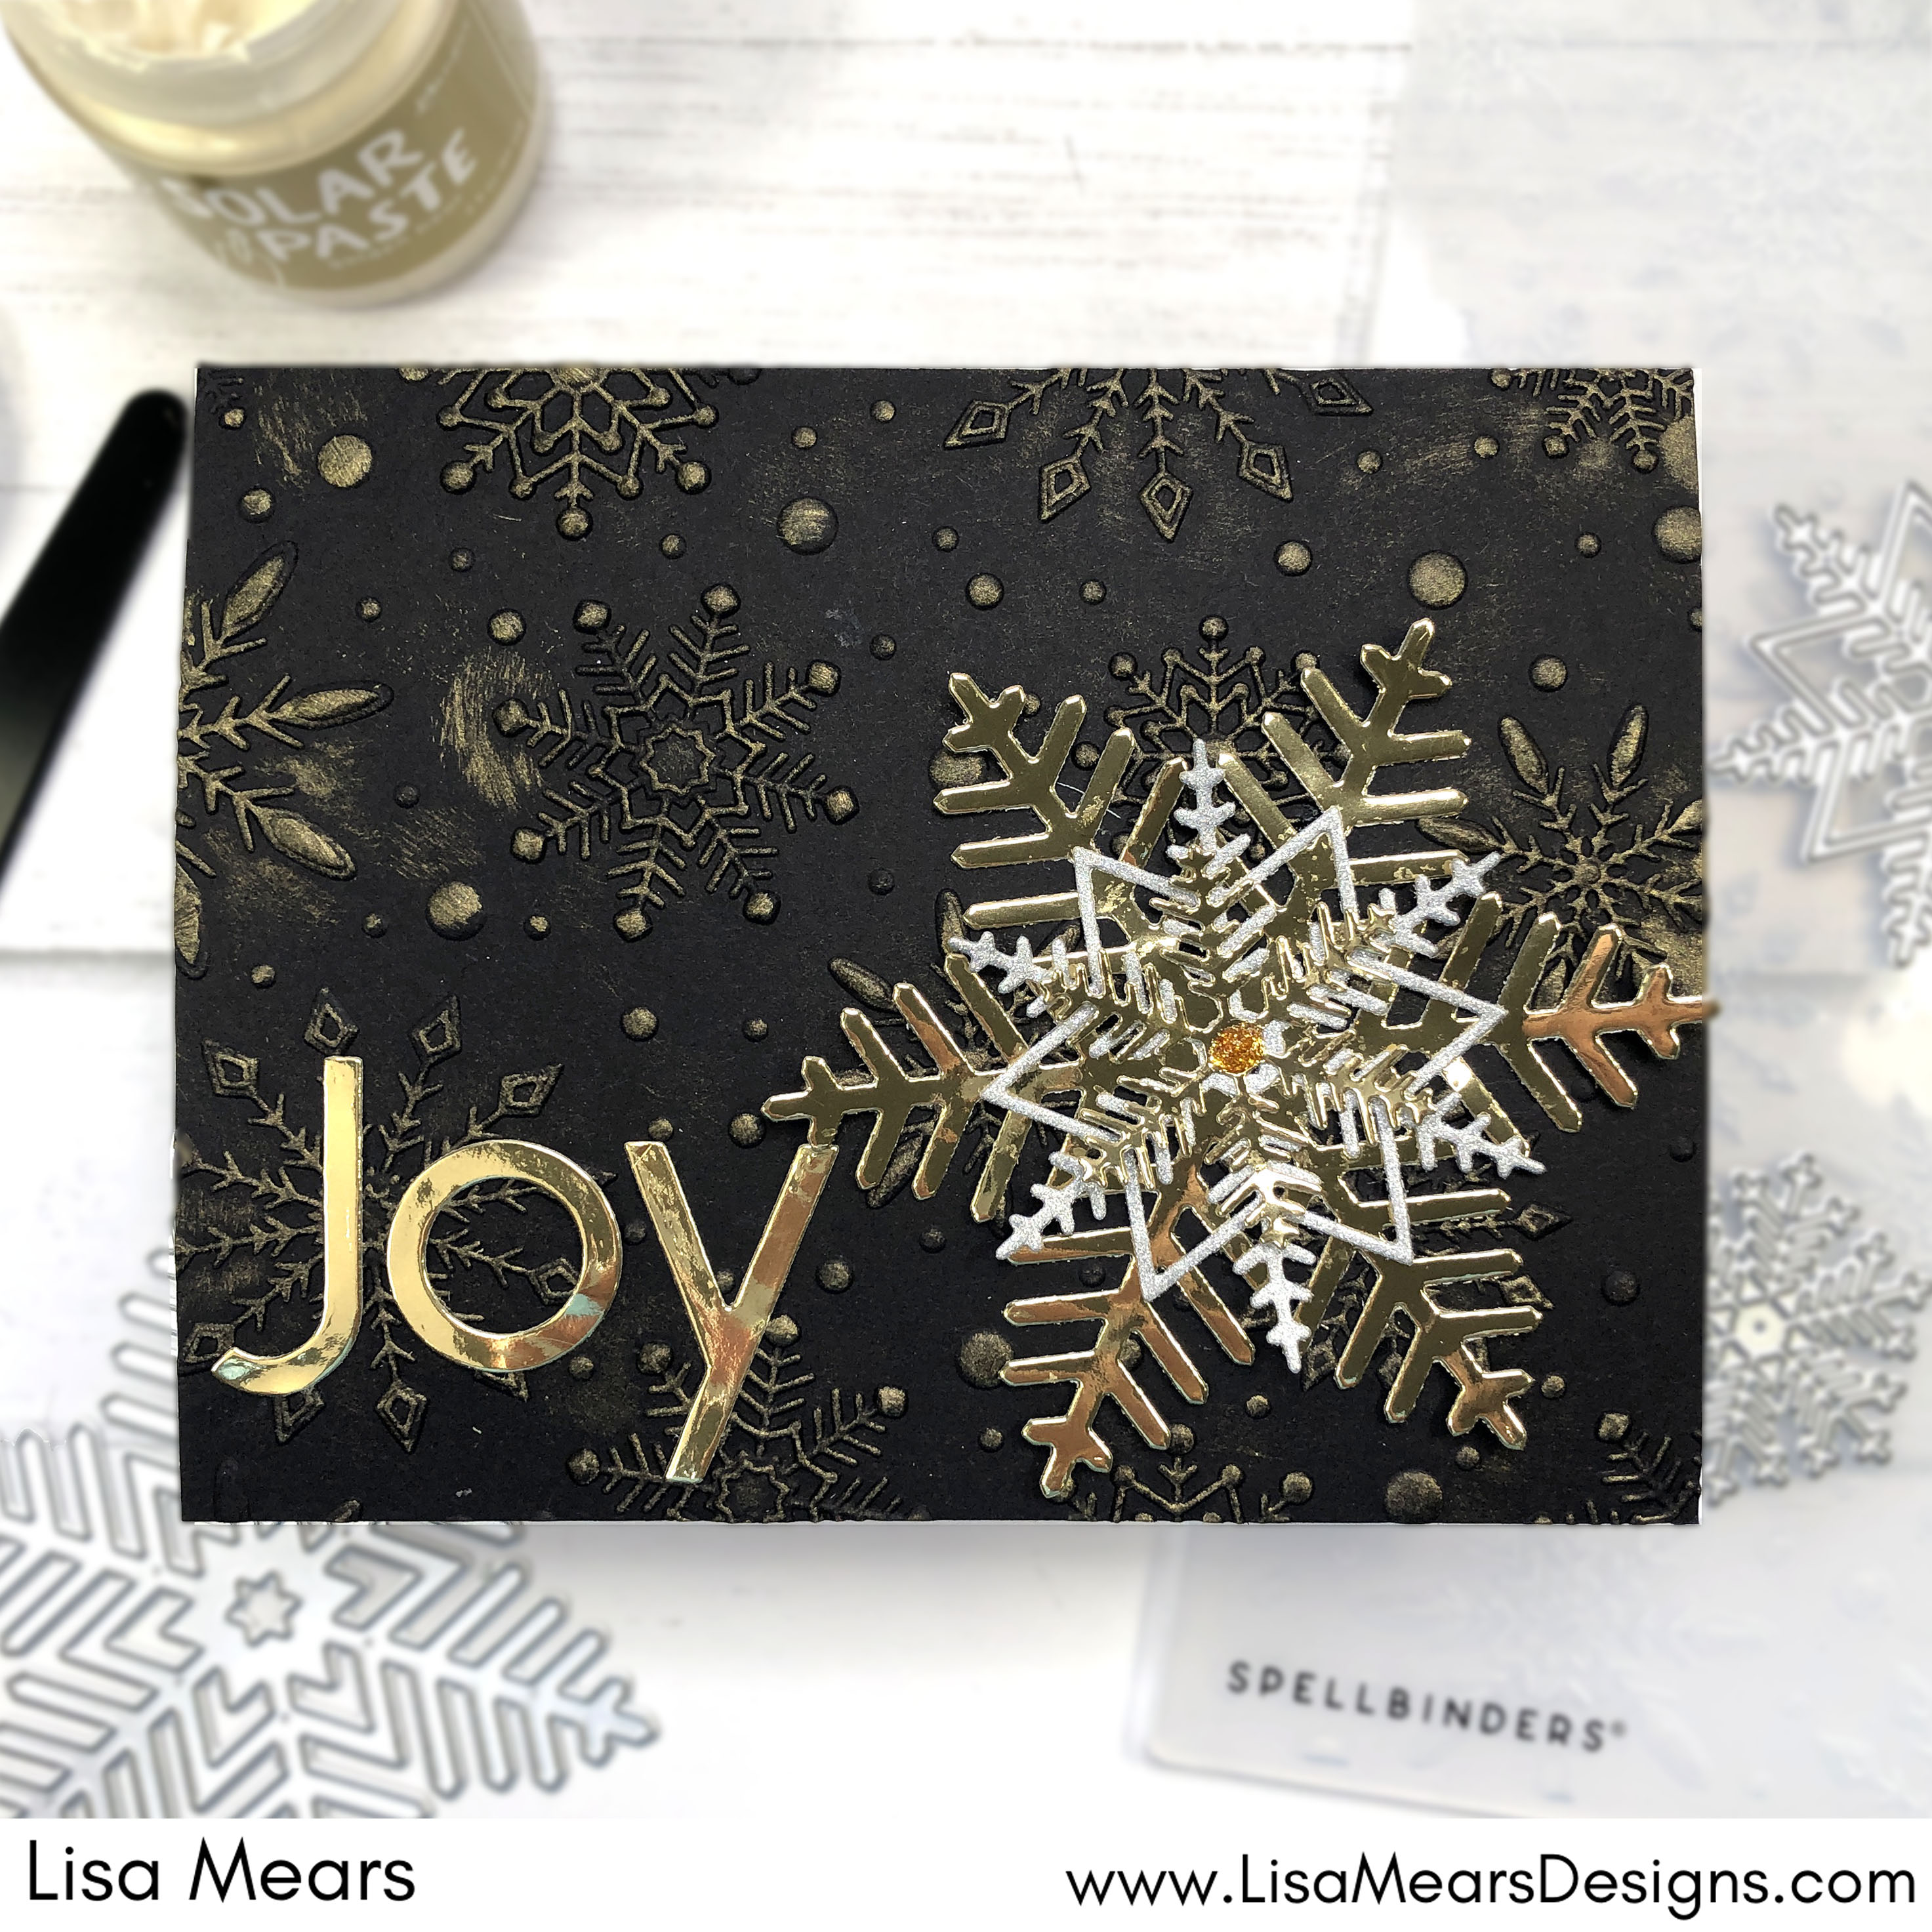
SUPPLIES USED:
- Simon Hurley Solar Paste, Golden Hour
- Spellbinders Flurry of Snowflakes Embossing Folder
- Scrapbook.com Snowflake Dies
- Scrapbook.com Modern Dies
- Scrapbook.com Holographic Mirror Paper
- Scrapbook.com Mixed Metals Glitter Paper Pad
- Scrapbook.com Pops of Color, Glitter Gold
- Scrapbook.com Ink Blending Tool
- Spellbinders Onxy Cardstock
- Spellbinders Black Platinum 6 Diecutting Machine
Technique 4: Use Solar Paste to Make Card Backgrounds
For this card, I applied all colors of the Solar Paste with a palette knife to black cardstock. Once dry, I added the background underneath the Scrapbook.com Mosaic background die. I created another background with Solar Paste and this time I die cut the background from Scrapbook.com Butterfly dies and a sentiment.

SUPPLIES USED:
- Simon Hurley Solar Paste (all colors)
- Scrapbook.com Mosaic Die
- Scrapbook.com Butterflies 1 Dies
- Scrapbook.com Holographic Mirror Paper
- Ranger Palette Knife
- Scrapbook.com Thank You Sentiment Dies
- Pink and Main EZ Flow Water Brushes
- Scrapbook.com Pops of Color, Gold Glitter
Technique 5: Use Solar Paste to Color Stamps
For my last technique, I head embossed the Scrapbook.com Wildflowers stamp onto black cardstock with Brutus Monroe Gilded Embossing Powder. I used a dry paint brush to paint the Solar Paste onto the stamped image.

SUPPLIES USED:
- Simon Hurley Solar Paste – Crocodile Tears, Cross My Heart, and Beluga
- Scrapbook.com Wildflowers Stamp Set
- Scrapbook.com Wordfetti Sunny Days Stamp Set
- Scrapbook.com Holographic Paper, 4.25 x 5.5
- Heat Tool
- Versamark Ink
- Brutus Monroe Gilded Embossing Powder
- Misti Stamping Tool
- Pink and Main Magic Anti-Static Brush
- Spellbinders Onxy Cardstock
I hope you liked my cards today. Don’t forget, you can watch a full tutorial below or on YouTube showing how I made these cards.
Thank you so much for stopping by today.
Have a wonderful day!
Lisa
Follow me for more inspiration:
- Blog – https://lisamearsdesigns.com/
- Instagram – LisaMearsDesigns
- Facebook – Lisa Mears Designs
- Pinterest – https://www.pinterest.com/lisamearsdesigns/
- You Tube – https://www.youtube.com/c/LisaMearsDesigns
- Etsy – https://www.etsy.com/shop/LisaMearsDesigns

These are phenomenal, Lisa! Will check out Simon’s new paste soon.
Lori S in PA
LikeLiked by 1 person
Thanks Lori
LikeLike
Thanks so much for the help. I love the look this gives. Judy
LikeLiked by 1 person
I totally enjoyed your video. I bought all the colors and you gave me so many ideas. I am going to share this with my friends. I can’t wait for more ideas!!
LikeLiked by 1 person
Thank you Patty. So glad to hear you liked my video.
LikeLike