

Hello Crafty Friends.
Today I’m sharing seven ways to use glitter brush markers in to create stunning card designs. I’m using the Scrapbook.com Glitter Brush Markers for my cards today. Glitter brush markers are watercolor markers with glitter inside! They come in a wide array of colors and you can see all of the markers by clicking HERE.
Pictured below are the cards I made using glitter brush markers.

If you would like to see how I made my cards, you can watch my video below or on YouTube.
For my cards, I used Scrapbook.com’s brand new Heavy Weight Mixed Media Paper Pad. The paper pad comes in white and black cardstock and is perfect for all kinds of mixed media projects. The paper is thick (400 GSMs) and very smooth! This paper holds A LOT of water and the markers blend beautifully on it.

I started off by creating backgrounds with the glitter brushes. I couldn’t create just one background so I created several. The markers spread beautifully on the paper. The colors are so vibrant and the glitter is absolutely stunning!


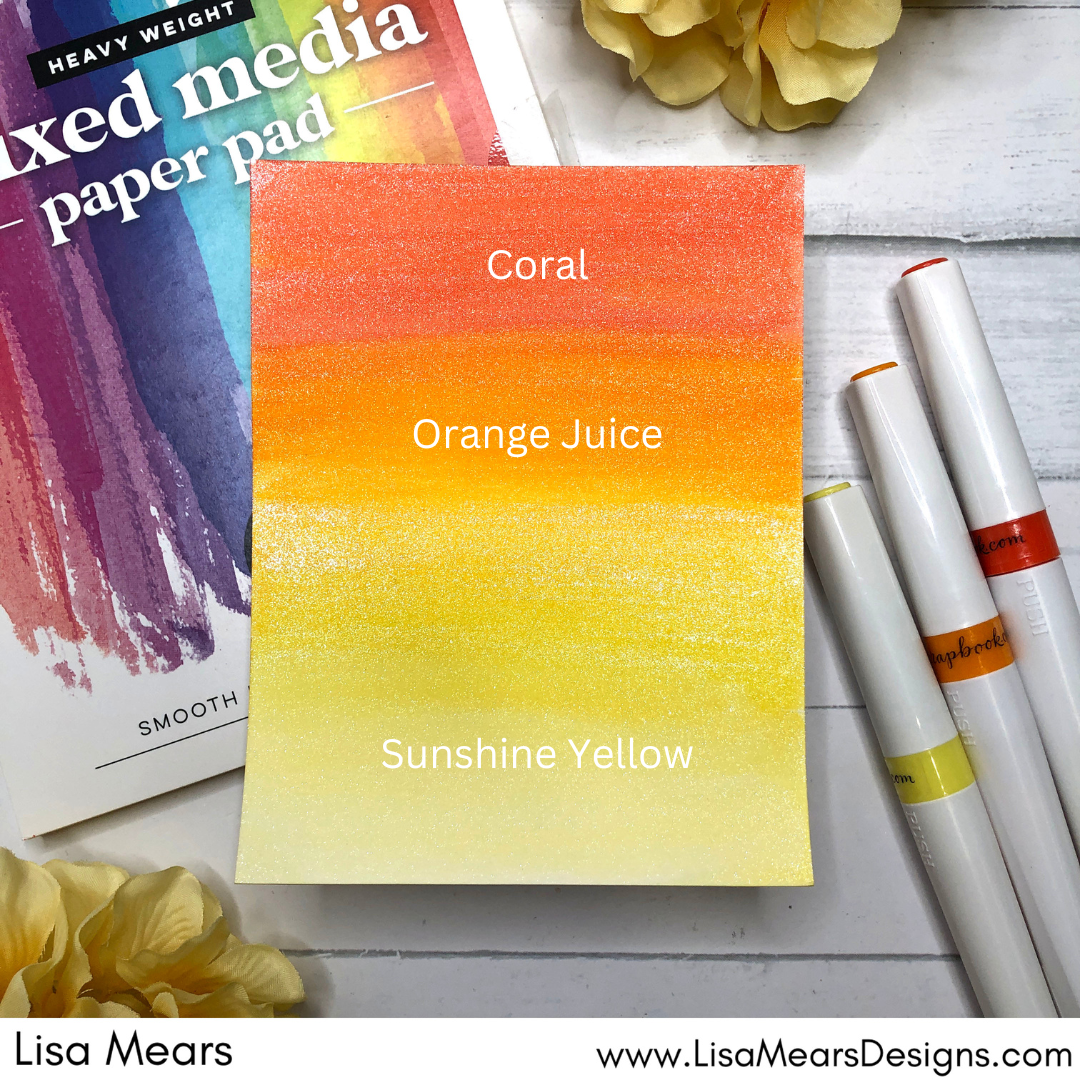
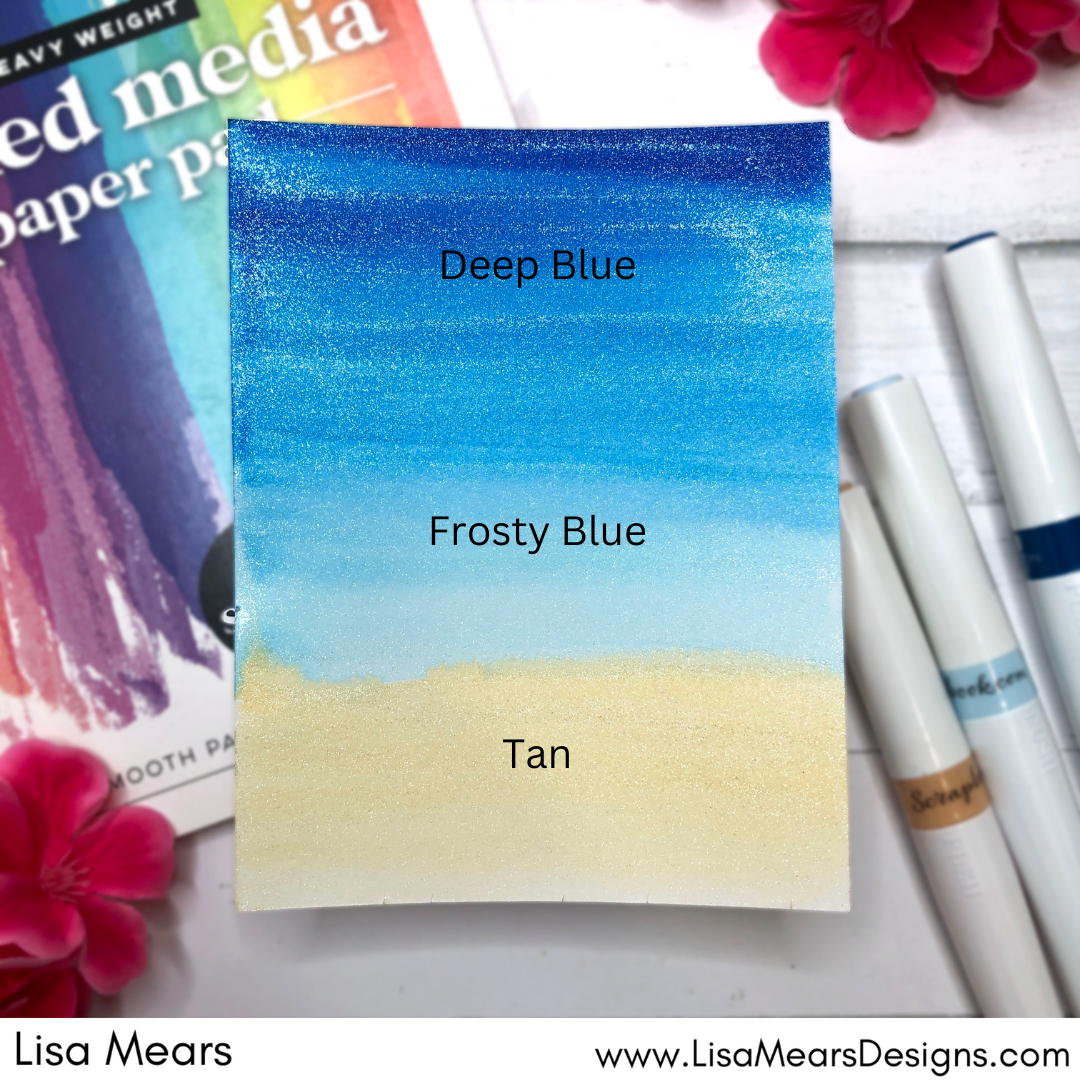

To create the backgrounds, I colored the Scrapbook.com Glitter Brush Marker from left to right across the paper. Next, I used a Pink and Main EZ Flow Water Brush to blend the colors.
Once all of my backgrounds were created, I started to make my cards. Let’s look at some ways that you can use these backgrounds with cards.
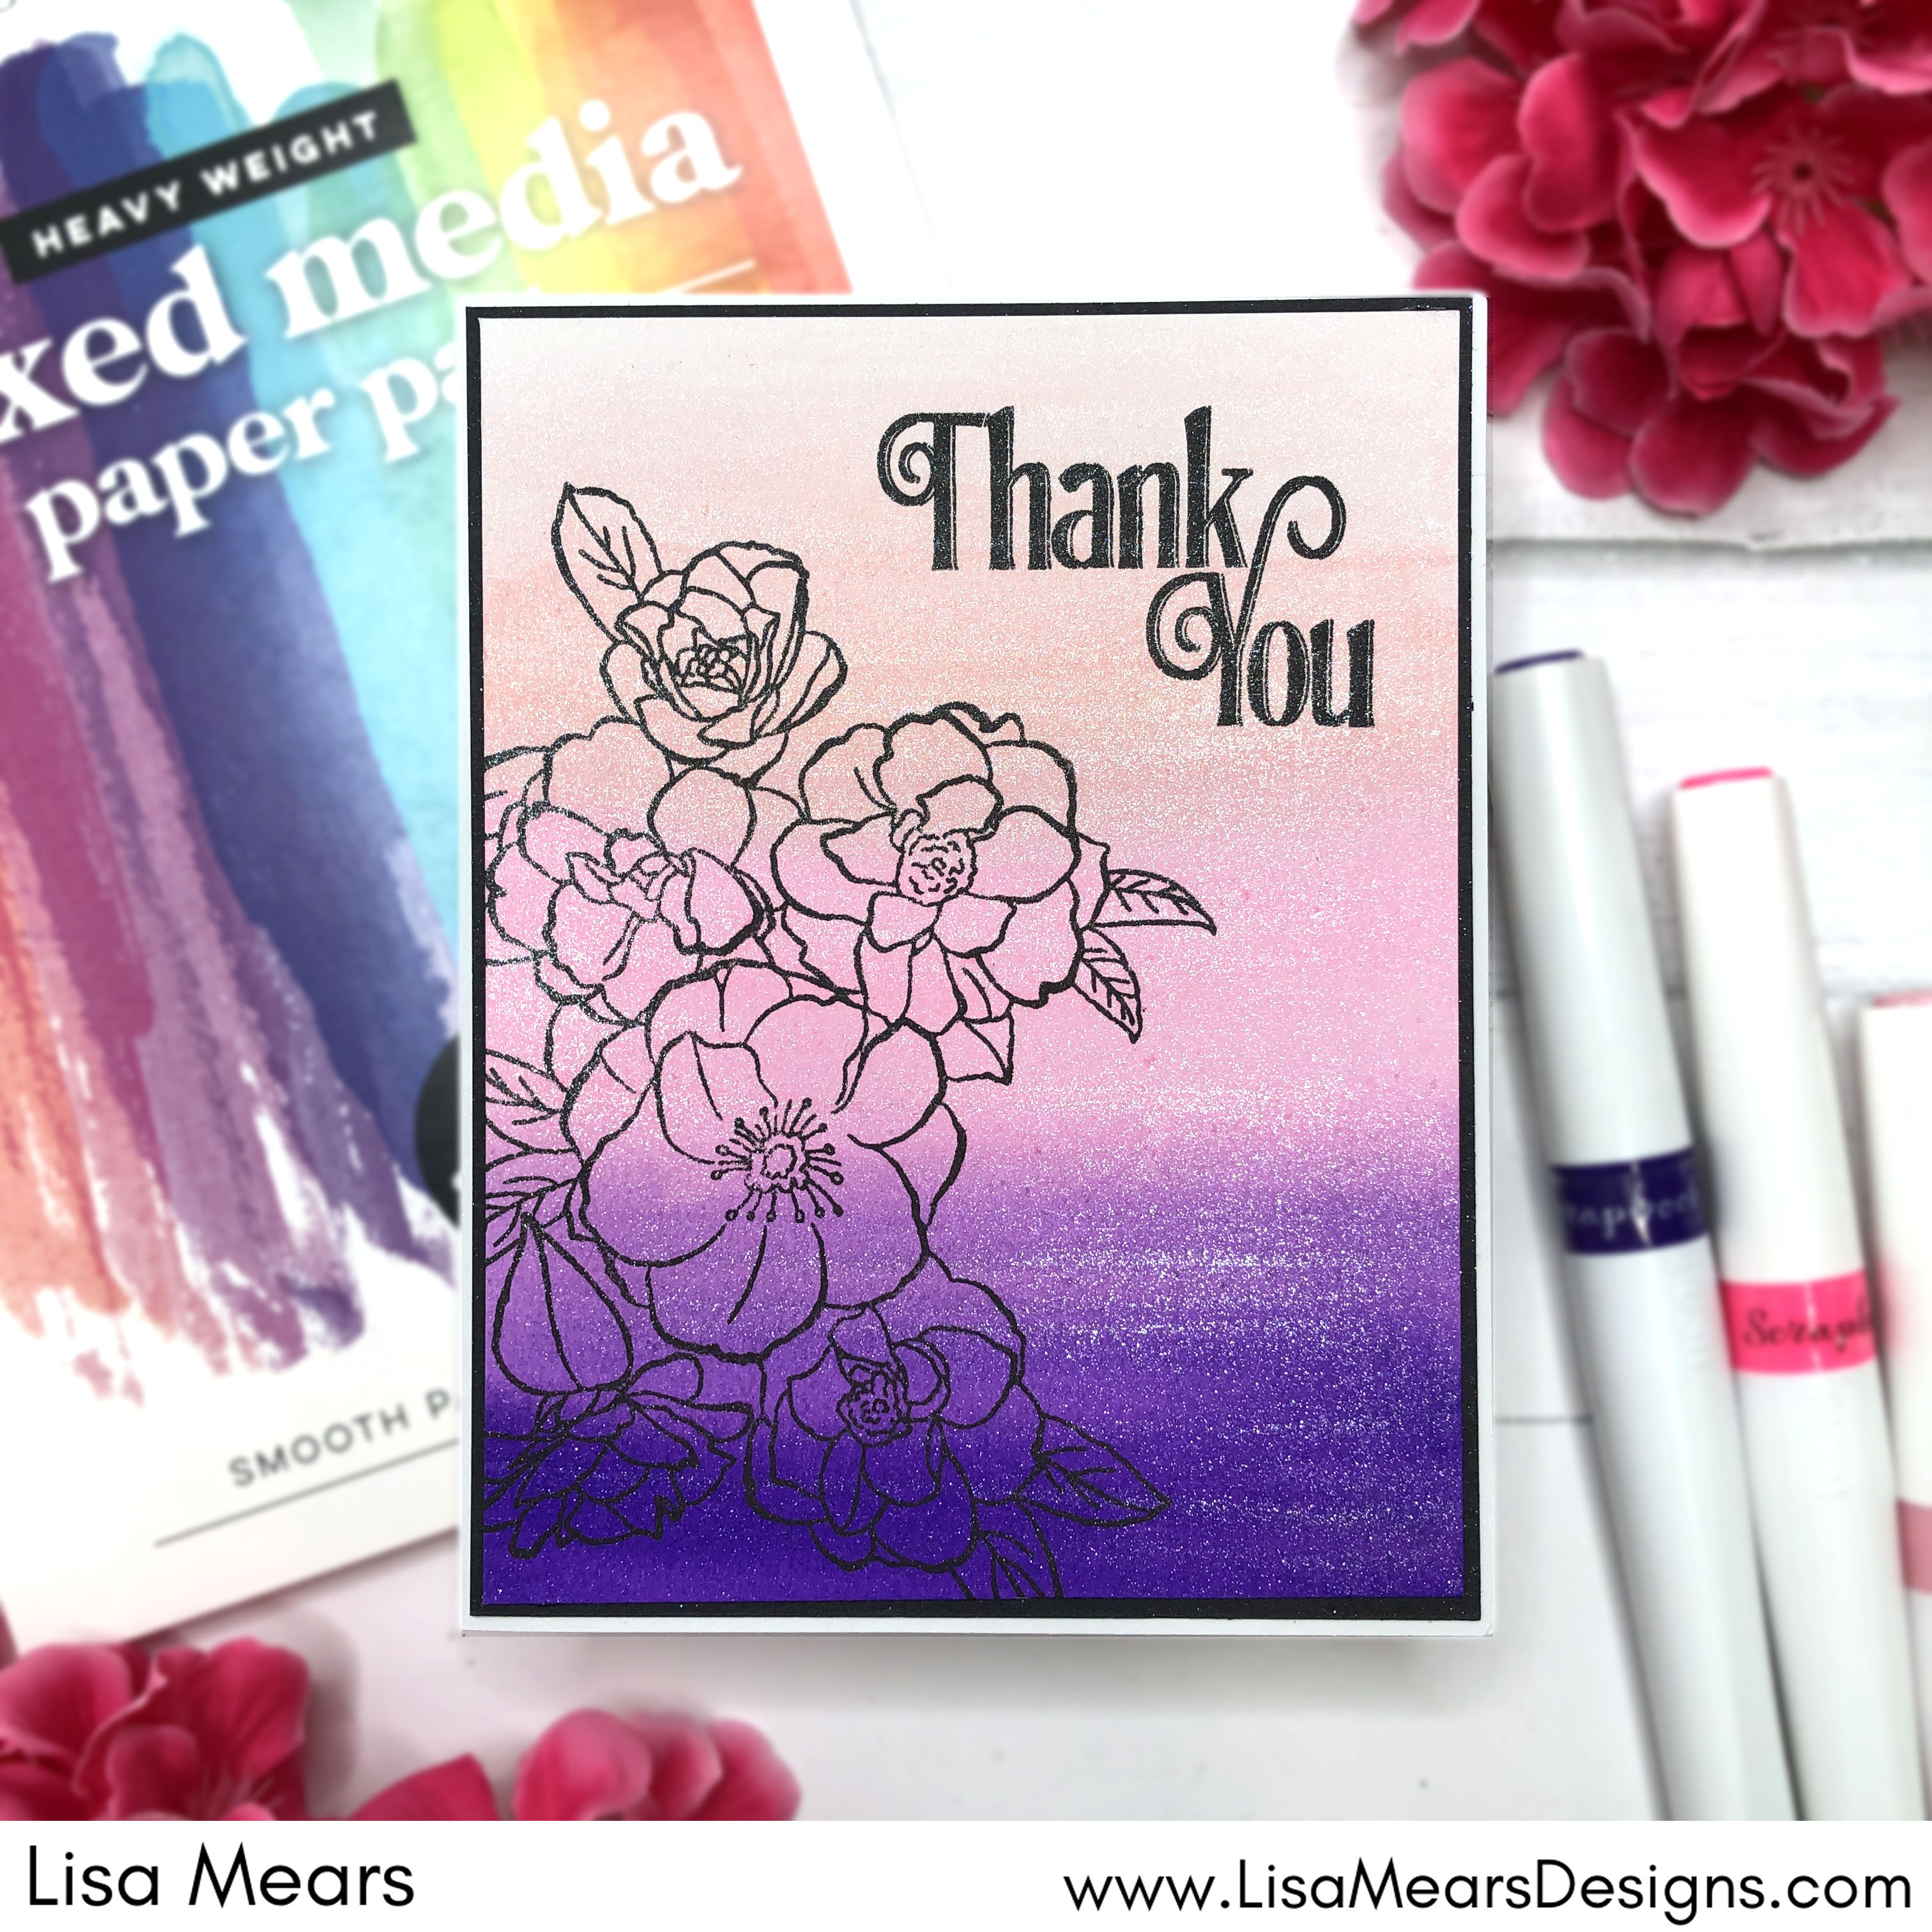
Technique 1 – Use Glitter Brush Backgrounds with Outline Stamps and Black Ink
SUPPLIES USED:
- Scrapbook.com Mixed Media Cardstock, White
- Scrapbook.com Glitter Brush Markers: Pretty Pink, Raspberry Pink, Royal Purple
- Scrapbook.com Rose Blossoms Stamp
- Pink and Main EZ Flow Brush
- Sizzix Art Nouveau Sentiments
- Scrapbook.com Black Hybrid Ink
- Scrapbook.com Double Sided Silicone Craft Mat
Technique 2: Use Glitter Brush Backgrounds with Outline Stamps and White Embossing Powder for Darker Backgrounds
SUPPLIES USED:
- Scrapbook.com Mixed Media Cardstock, White
- Scrapbook.com Glitter Brush Markers: Deep Blue, Frosty Blue, Royal Purple
- Scrapbook.com Rose Blossoms Stamp
- Pink and Main EZ Flow Brush
- Pink and Main Magic Anti-Static Brush
- Scrapbook.com Thank You Sentiment Dies
- Pinkfresh Studio Jewels, Glacier
- Ranger Super Fine White Embossing Powder
- Scrapbook.com Double Sided Silicone Craft Mat
Technique 3 – Use Glitter Brush Backgrounds with Stamp Sets to Make Outdoor Scenes
In this card example, the Key Lime Green Glitter Brush Marker represents the grass and the Raspberry Pink and Pretty Pink Glitter Brush Markers represent the sky to create this cute little outdoor scene.

SUPPLIES USED:
- Scrapbook.com Mixed Media Cardstock, White
- Scrapbook.com Glitter Brush Markers: Pretty Pink, Raspberry Pink, Key Lime Green
- Scrapbook.com Spring Animals Stamp
- Waffle Flower Nesting Oval Dies
- Pink and Main EZ Flow Brush
- Sizzix Art Nouveau Sentiments
- Pink and Main Scallop Rectangle Dies
- Scrapbook.com Neutrals Paper Pad
- Scrapbook.com Black Hybrid Ink
- Scrapbook.com Double Sided Silicone Craft Mat
Technique 4: Use Glitter Brush Backgrounds with White or Black Die Cuts

SUPPLIES USED:
- Scrapbook.com Mixed Media Cardstock, White
- Scrapbook.com Glitter Brush Markers: Pretty Pink, Raspberry Pink, Deep Blue
- Scrapbook.com Sprig Dies
- Pink and Main EZ Flow Brush
- Sizzix Art Nouveau Sentiments
- Pretty Pink Posh Scallop Frame Dies
- Scrapbook.com Black Hybrid Ink
- Scrapbook.com Double Sided Silicone Craft Mat
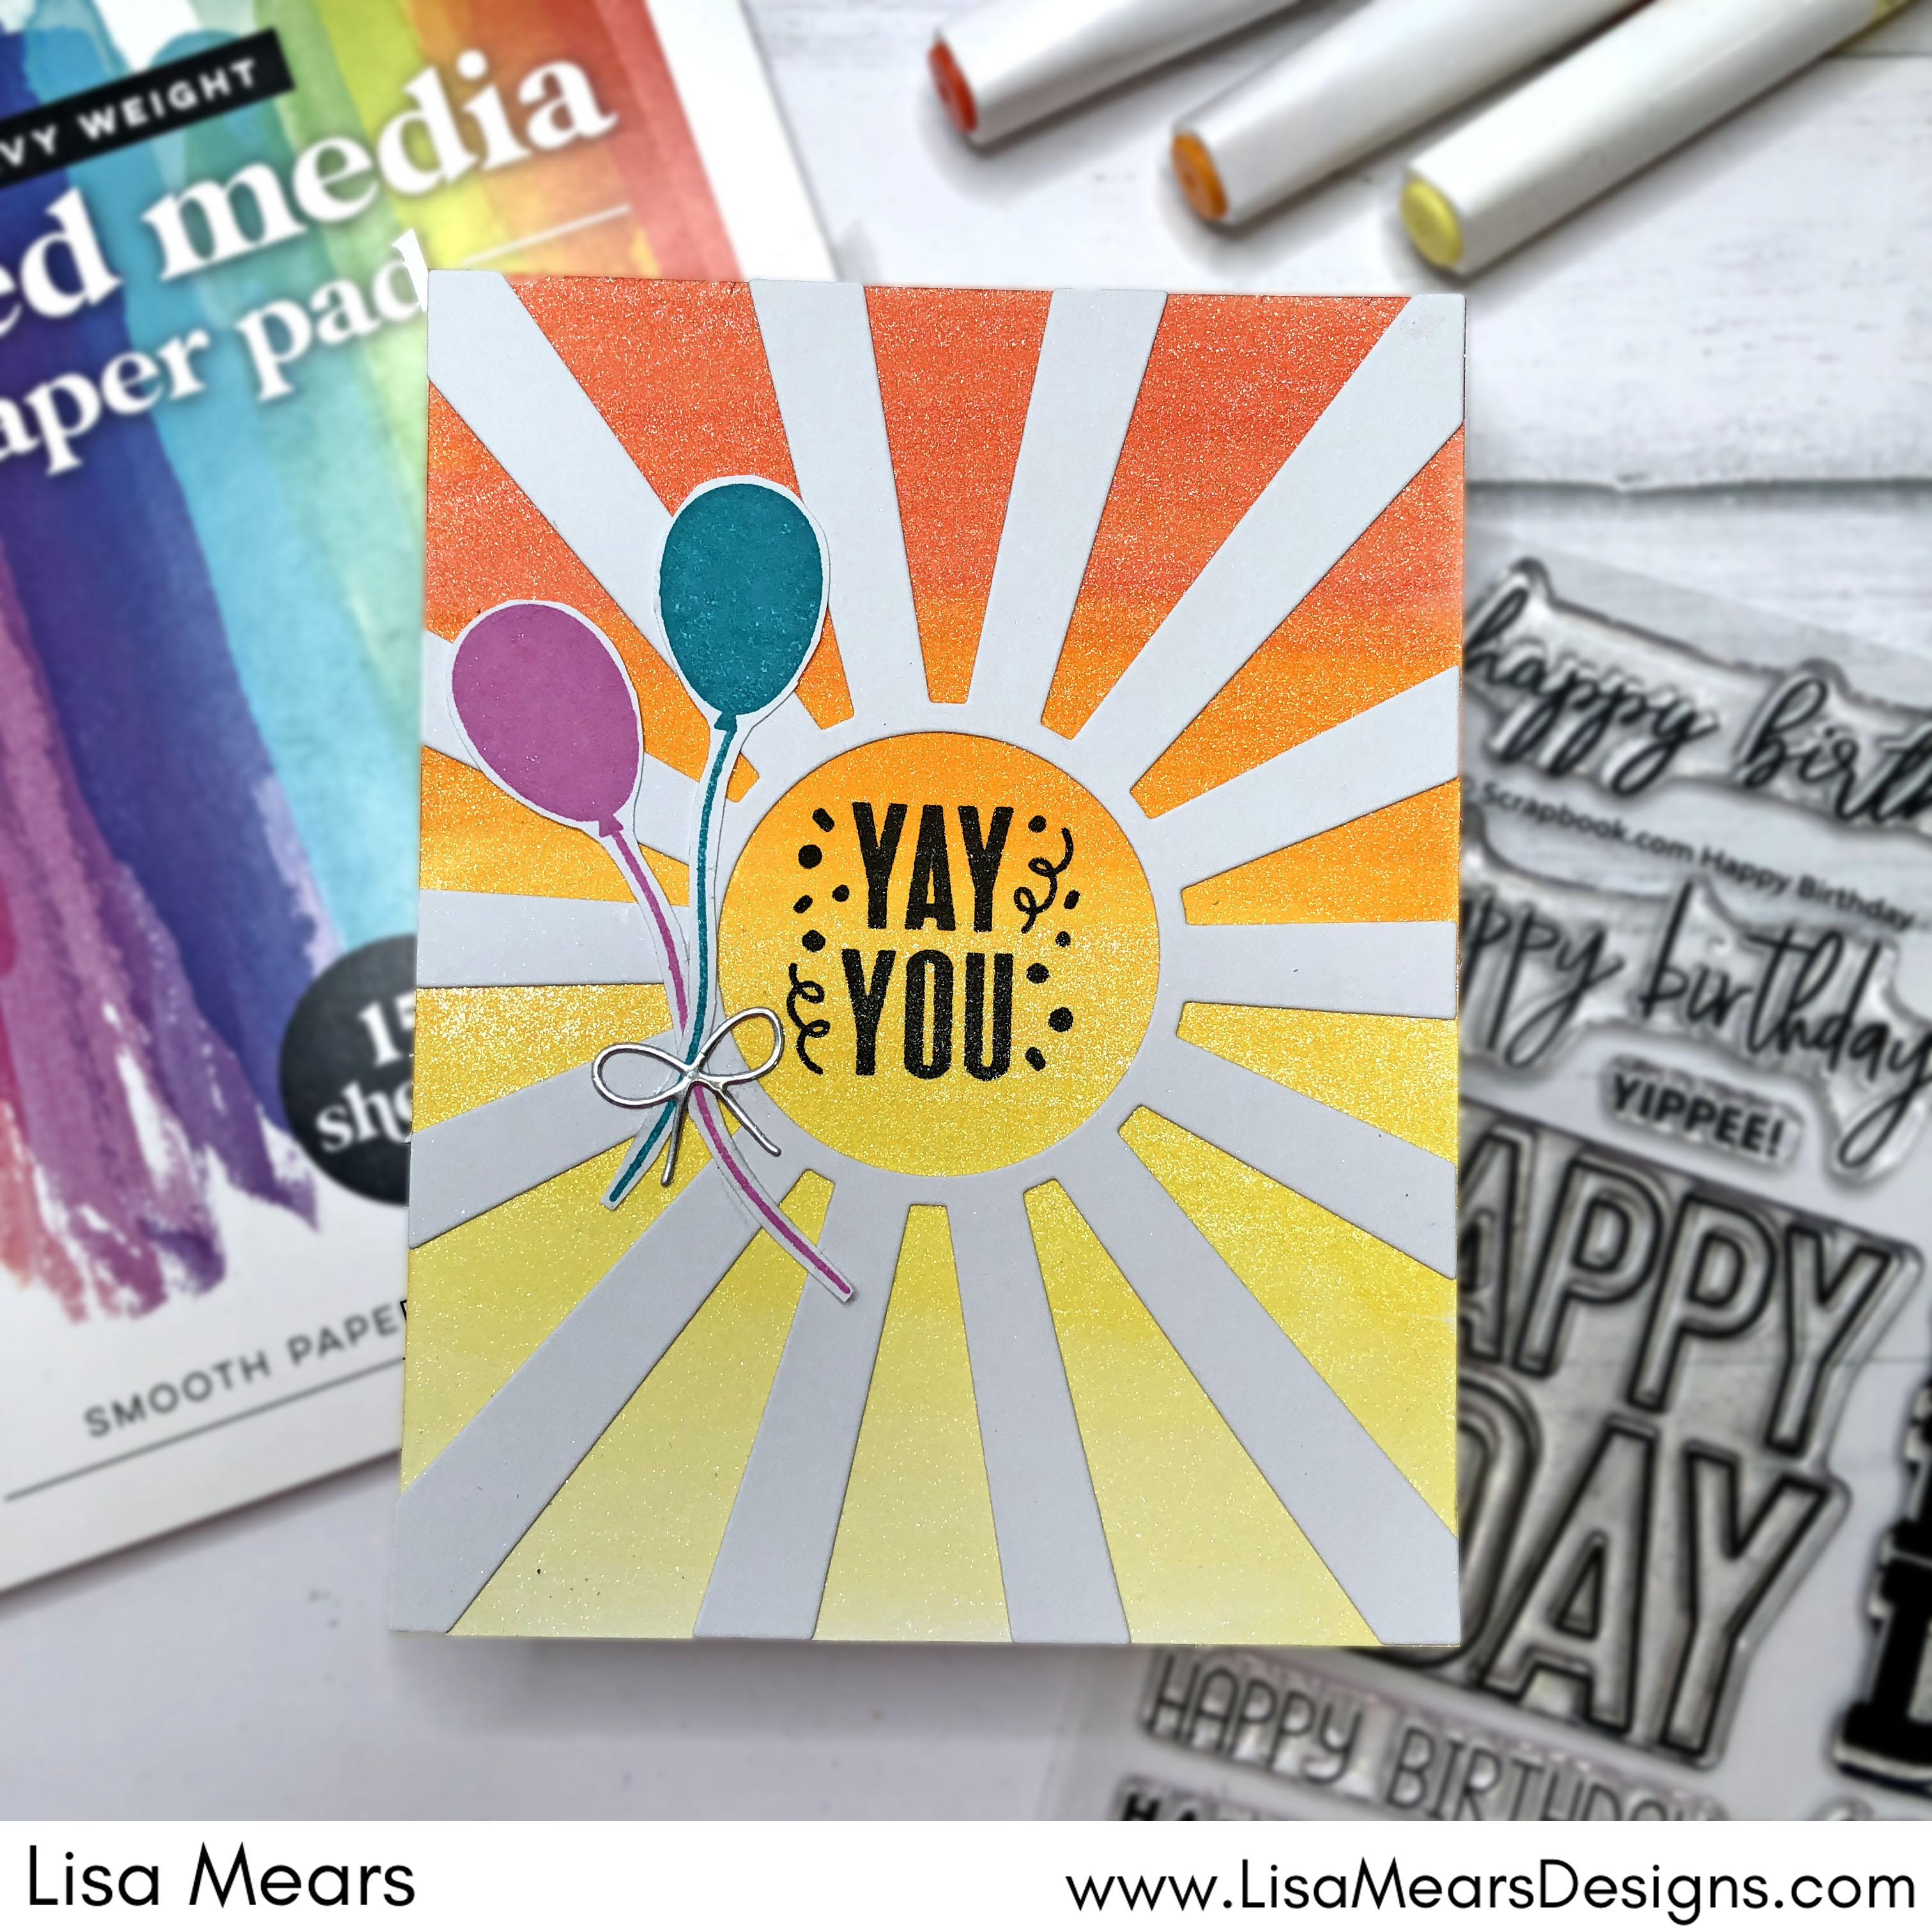
Technique 5: Use Glitter Brush Backgrounds with Cover Plate or Background Dies
SUPPLIES USED:
- Scrapbook.com Mixed Media Cardstock, White
- Scrapbook.com Glitter Brush Markers: Coral, Orange Juice, Sunshine Yellow
- Scrapbook.com Sunburst A2 Plate
- Scrapbook.com Bow Topper Dies
- Scrapbook.com Party Animal Stamp
- Scrapbook.com Happy Birthday Stamp
- Pink and Main EZ Flow Brush
- Catherine Pooler Ink, All That Jazz
- Catherine Pooler Ink, Be Mine
- Scrapbook.com Black Hybrid Ink
- Scrapbook.com Double Sided Silicone Craft Mat
Technique 6: Stamping – Apply Glitter Brush Marker Directly to Stamp and then Add Water

SUPPLIES USED:
- Scrapbook.com Mixed Media Cardstock, White
- Scrapbook.com Glitter Brush Markers: Royal Purple, Sunshine Yellow, Key Lime Green
- Ranger Distress Sprayer
- Scrapbook.com Rose Blossoms Stamp
- Pink and Main Magic Anti-Static Brush
- Pretty Pink Posh Valentine Sentiments and Coordinating Dies
- Scrapbook.com Nested Heart Dies
- Spellbinders Leafy 3D Embossing Folder
- Ranger Super Fine White Embossing Powder
- Scrapbook.com Black Hybrid Ink
- Scrapbook.com Double Sided Silicone Craft Mat
Technique 7: Use Glitter Brush Markers to Color Stamps

For this example, I used the Glitter Brush Markers to color the Rose Blossom stamp. You can also use the Scrapbook.com Clear Glitter Brush Marker to color over non-water based markers. Be sure to check out my video for an example.
- Scrapbook.com Mixed Media Cardstock, White
- Scrapbook.com Glitter Brush Markers: Orange Juice, Sunshine Yellow, Key Lime Green, Raspberry Pink, Pretty Pink
- Scrapbook.com Rose Blossoms Stamp
- Pretty Pink Posh Valentine Sentiments and Coordinating Dies
- Pink and Main EZ Flow Brush
- Spellbinders Dazzling Dots 3D Embossing Folder
- Pinkfresh Studio Jewels, Glacier
- Pink and Main Magic Anti-Static Brush
- Ranger Super Fine White Embossing Powder
- Scrapbook.com Double Sided Silicone Craft Mat
I hope you liked my cards today. Don’t forget, you can watch a full tutorial below or on YouTube showing how I made these cards.
Thank you so much for stopping by today.
Have a wonderful day!
Lisa
Follow me for more inspiration:
- Blog – https://lisamearsdesigns.com/
- Instagram – LisaMearsDesigns
- Facebook – Lisa Mears Designs
- Pinterest – https://www.pinterest.com/lisamearsdesigns/
- You Tube – https://www.youtube.com/c/LisaMearsDesigns
- Etsy – https://lisamearsdesigns.etsy.com

A ton of great ideas and info – pretty results! Thanks!
Lori S in PA
LikeLiked by 1 person