

Hello crafty friends.
Pretty Pink Posh is turning 9 this month and I’m so excited to be joining them to celebrate their 9th birthday! In this birthday release, you will find all things birthday related from stencils, stamps, dies, and more!
To celebrate this release, Pretty Pink Posh is having a blog hop where you have a chance to win one of eight $25 gift certificates to the Pretty Pink Posh shop. Be sure to read all the way to the end of this post to find out more about the blog hop, see some of the cards I made with this release, and find links to all of the supplies I used to make my cards.
If you would like to see all of the products in the release, you can watch my video below or on YouTube.
You can purchase all of the products in one bundle and save 10 percent.
To purchase the February 2023 bundle click HERE.
To purchase the stencil bundle, click HERE.
For the blog hop, I’m sharing three stenciled cards that I made with some of the new products from Pretty Pink Posh’s new release. I love making cards using the layered stencils from Pretty Pink Posh because you can make a beautiful colorful card in a matter of minutes. Just ink the stencils using your favorite inks, add a sentiment, and you’re done! For my cards, I’m going to step up my stenciling just a little by adding a bit of sparkle for that extra touch.
If you would like to see how I made all of my cards, be sure to check out my video below or on YouTube.
Card 1
For my first card, I used the Pretty Pink Posh Layered Party Hats four-layer stencil. I added inks in different colors to each row of the party hats. I used a piece of white card stock with the following Scrapbook.com inks:
Layer A – I added lighter inks to the first layer. I used Scrapbook.com Pink Lemonade Ink (first row), Scrapbook.com Pink Flamingo (second row), Scrapbook.com Parisian Purple (third row), and Scrapbook.com Ballgown Blue (fourth row).
Layer B – For the second layer, I added darker inks in the same color families for the patterns on the party hats. If you don’t have a darker ink in the same color family, you can use the same inks you used for Layer A, but just add more ink and little more pressure to get a darker result. The inks I used are Scrapbook.com Havana Red Ink (first row), Scrapbook.com Mixed Berry (second row), Scrapbook.com Mardi Gras (third row), and Scrapbook.com Surfboard (fourth row).
Layer D – I skipped Layer C and added the last layer next. This is the layer with the stars. I used Scrapbook.com Lantern Light ink for the stars. The reason I added the last layer next is because for Layer C, I planned on adding a liquid embellishment which will take time to dry. So by adding the liquid embellishment last, I was able to finish the stenciled background much quicker.
Layer C – I added Scrapbook.com Silver Glitter Pops of Color to the pom poms on the party hats. The Pops of Color is a liquid embellishment and this one adds a nice sparkle of glitter to the background. Make sure you let your project have time to dry before adding a sentiment to the top.

While the background was drying, I colored the Tiger stamp from the Birthday Signs stamp set and die cut it with the coordinating dies. I used the following colors of Zig Clean Color Real Brush Pens:
Tiger – Orange, Flesh Color
Tiger’s Mouth – Mustard, Blender
Tiger’s Nose – Mid Brown
Sign – English Lavender
Pom Pom – Yellow
Party Hat – Cobalt Blue, Carmine Red, Blender
I stamped the sentiment “Happy Birthday” inside of the sign. I added the stamped image to the stenciled card front.

The card panel measures 4 1/4″ x 5 1/2″ and was adhered to an A2 card base.

If you want to see how I made this card, watch my video on YouTube.
Products Featured:
- Pretty Pink Posh Layered Party Hats Stencil
- Pretty Pink Posh Birthday Signs Stamp Set
- Scrapbook.com Inks — Pink Lemonade, Havana Red, Pink Flamingo, Mixed Berry, Parisian Purple, Mardi Gras, Ballgown Blue, Surfboard, Lantern Light
- Scrapbook.com Silver Glitter Pops of Color
- Zig Clean Color Real Brush Pens
- Ranger Palette Knife
- Scrapbookcom Ink Blending Tool
- Bristol Smooth Cardstock (for stamping/coloring)
- Versafine Onxy Black Ink (for stamping)
- Wendy Vecchi Make Art Stay-tion
- Misti Stamping Tool
Card 2
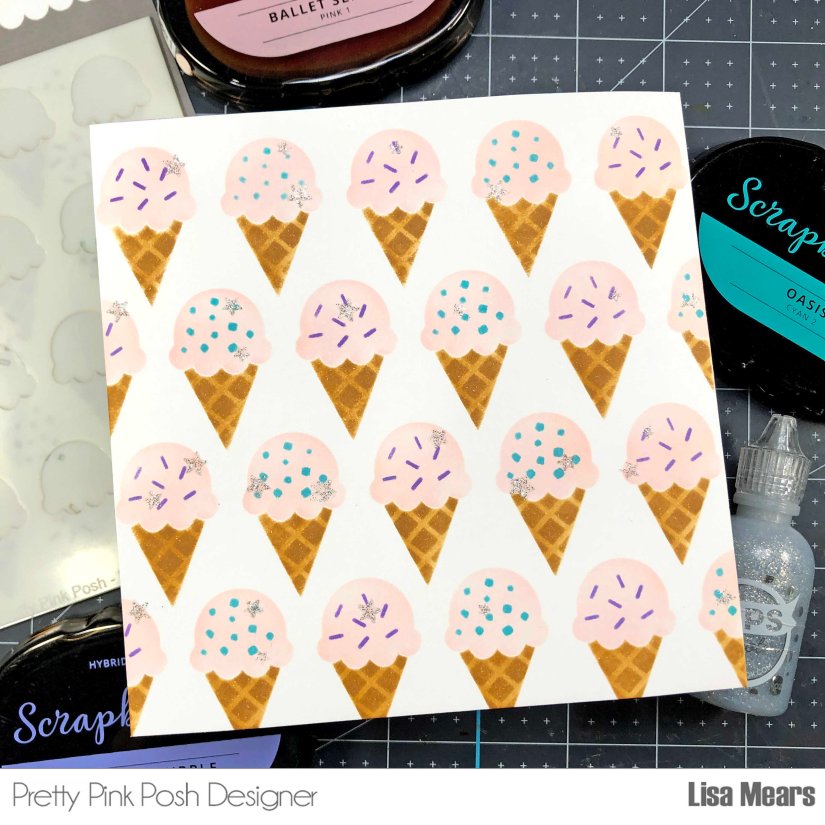
For my next card, I used the Pretty Pink Posh Layered Ice Cream Cones four-layer stencil. I used a piece of white card stock with the following Scrapbook.com inks:
Layer A – Scrapbook.com Gingerbread Ink
Layer B – Scrapbook.com Leather Ink
Layer C – Scrapbook.com Ballet Slipper Ink
Layer D – Scrapbook.com Oasis and Parisian Purple Inks
After adding the inks to all of the layers, I decided to bring in a stencil from the Party Hats Layered Stencil set. The stencil I used is the star stencil from this set. I used Scrapbook.com Silver Glitter Pops of Color to add a bit of sparkle. Since the Pops of Color is a liquid embellishment, I let the background dry completely before putting the rest of the card together.
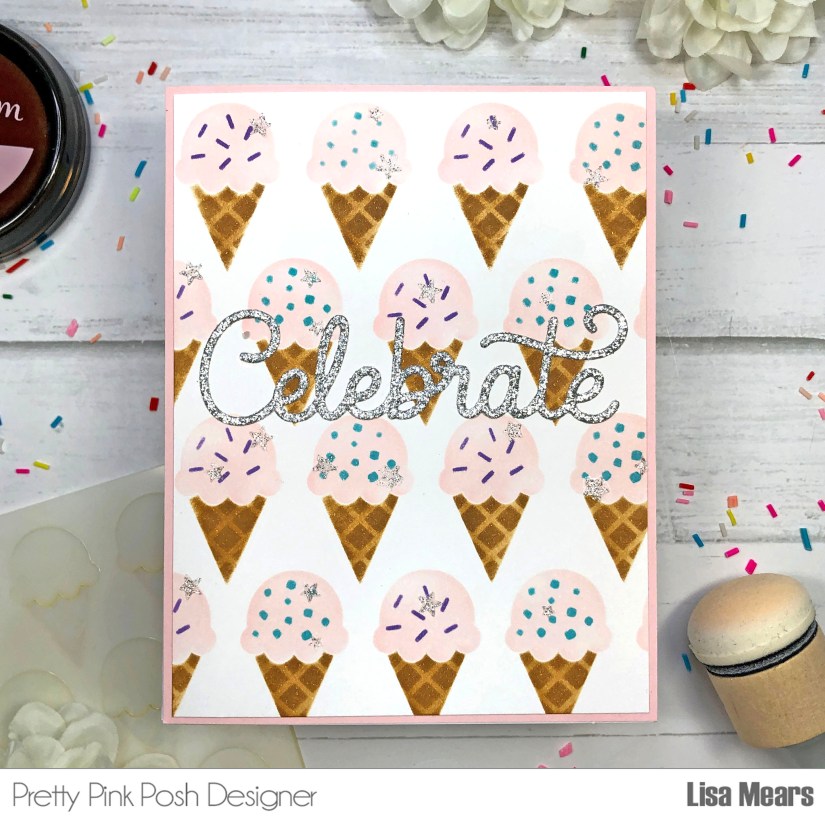
 Once the background was dry, I cut it down to 4 1/8″ x 5 3/8″. I die cut the Large Celebrate Shadow with silver glitter card stock and added it to the center of the card.
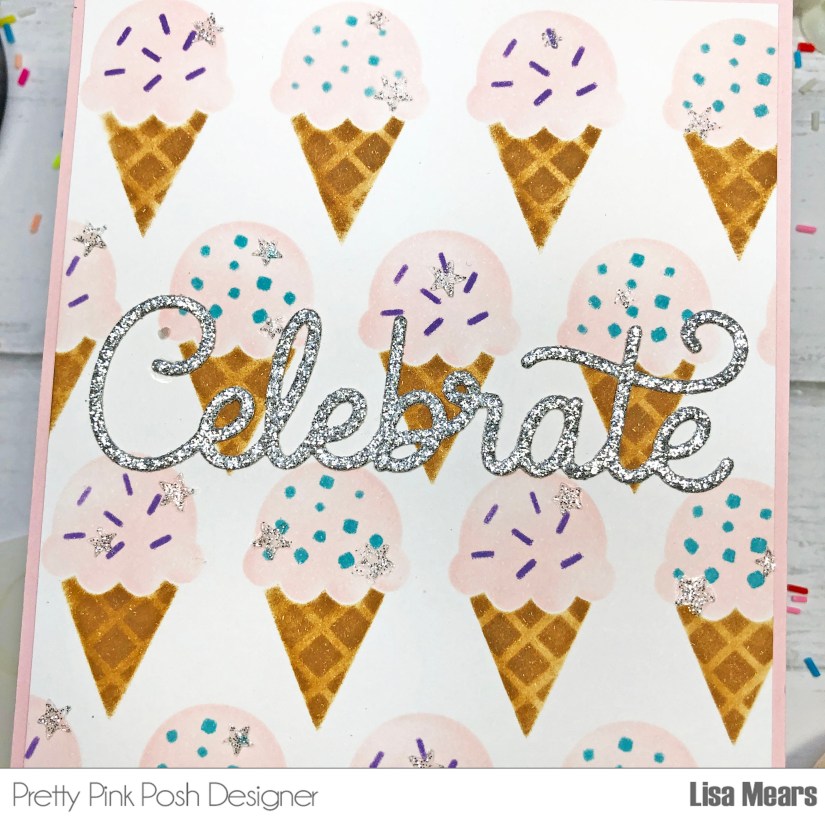
I added this layer to a piece of pink card stock that measures 4 1/4″ x 5 1/2″ and then added it to an A2 size card base.
If you want to see how I made this card, watch my video on YouTube.
Products Featured:
- Pretty Pink Posh Layered Ice Cream Cones Stencil
- Pretty Pink Posh Layered Party Hats Stencil (used the star stencil from this pack)
- Pretty Pink Posh Large Celebrate Shadow Die
- Scrapbookcom Inks — Gingerbread, Leather, Ballet Slipper, Oasis, Parisian Purple
- Scrapbookcom Silver Glitter Pops of Color
- Ranger Palette Knife
- Scrapbookcom Ink Blending Tool
- Wendy Vecchi Make Art Stay-tion
Card 3
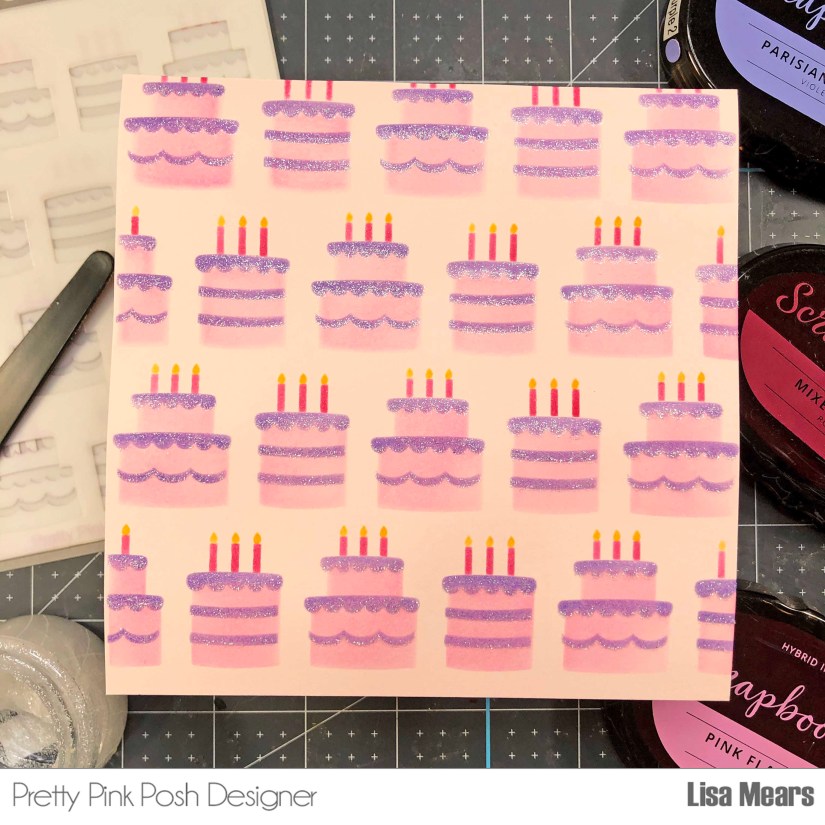
For my last card, I used the Pretty Pink Posh Layered Birthday Cakes four-layer stencil. I used a piece of light pink card stock and then used the following Scrapbook.com inks:
Layer A – Scrapbook.com Pink Flamingo Ink
Layer B – Scrapbook.com Parisian Purple Ink
Layer C – Scrapbook.com Mixed Berry Ink
Layer D – Scrapbook.com Orange Cream Ink
After adding ink to all of the stencils, I added back the Layer B stencil, which is the frosting layer, and applied Brutus Monroe’s Alabaster Glitter Glaze. The glitter glaze is a clear glaze with glitter added to it. What’s nice about this type of glitter glaze is that the underlying ink color shows through it which makes it look like there is glittery purple frosting.
 I cut the birthday cake layer to 4 1/8 x 5 3/8″ and then added a square shaker element to the card. The square frame is from the Pretty Pink Posh Party Cake die set. I added the Wish Big Script Die to the top.
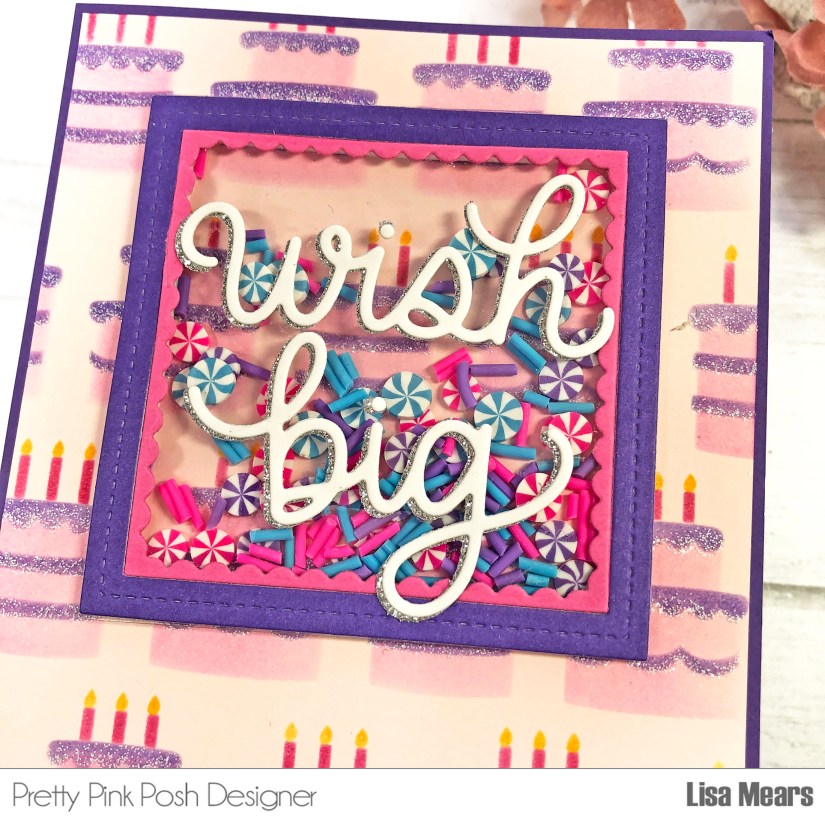 I added this panel to a piece of purple card stock that I cut to 4 1/4″ x 5 1/2″ and ten added it to an A2 size card base.

If you want to see how I made this card, watch my video on YouTube.
Products Featured:
- Pretty Pink Posh Layered Birthday Cakes Stencil
- Pretty Pink Posh Wish Big Script Die
- Pretty Pink Posh Party Cake Die
- Pretty Pink Posh Party Swirls Confetti Mix
- Scrapbook.com Inks – Pink Flamingo, Parisian Purple, Mixed Berry, Orange Cream
- Brutus Monroe Glitter Glaze – Alabaster
- Scrapbook.com Ink Blending Tool
- Ranger Palette Knife
- We R Memory Keepers Acetate
- Scrapbook.com Foam Strips
- Wendy Vecchi Make Art Stay-tion
There is a free gift offer and a coupon code if you decide to make a purchase in the Pretty Pink Posh shop.

Be sure to follow along in the Pretty Pink Posh Blog Hop where you have a chance to win one of eight $25 gift certificates to the Pretty Pink Posh store. Winners will be picked randomly along the blog hop. Comments must be left by 11:59 pm PST on 2/15/2023. Winners will be announced on the PPP blog.
Below are blog links for the other blog hop participants.
Thank you so much for stopping by today. Have a wonderful day!
Follow me for more inspiration:
- Blog – https://lisamearsdesigns.com/
- Instagram – LisaMearsDesigns
- Facebook – Lisa Mears Designs
- Pinterest – https://www.pinterest.com/lisamearsdesigns/
- You Tube – https://www.youtube.com/c/LisaMearsDesigns
- Etsy – https://www.etsy.com/shop/LisaMearsDesigns

Well I’m a sucker for shaker cards, so I have to say that last card is my fave!! Great job on all the cards – fun blog hop!
LikeLiked by 1 person
Such cute Birthday cards!!
LikeLiked by 1 person
Thank you Susan
LikeLike
Beautiful! I’m in love with that adorable tiger! You did an amazing job with the colouring!
LikeLiked by 1 person
Thank you so much
LikeLike
Oh what great cards! I love that tiger too! Thanks for sharing!
LikeLiked by 1 person
Love that shaker card!
LikeLiked by 1 person
Thank you Stacey
LikeLike
These are so much fun, love the pink ice cream cones!
LikeLiked by 1 person
I love the sparkle you added to the stenciling. Thank you for the stencil technique tips. My favorite card is the tiger with the sign. Birthday greeting.
LikeLiked by 1 person
Absolutely love your fun and inspirational cards from this release ❤️
LikeLiked by 1 person
Thank you
LikeLike
Such awesome cards! Love the stencils.
Thanks for sharing.
LikeLiked by 1 person
These stencils are just awesome. I love how you used each one – great cards!
LikeLiked by 1 person
Love the candies in the shaker.
The lion on the party hats is darling.
Great cards. thanks for sharing.
LikeLiked by 1 person
I love that you gave us three cards with three different ideas of how to design them. Beautiful cards.
LikeLiked by 1 person
The release is so good. E everyone inspiration is awesome
LikeLiked by 1 person
I especially love the glitter addition to the party hat stencil card. Fabulous colors – so bright and cheery!
LikeLiked by 1 person
Awesome cards. The glitter on the hats adds just the right amount of sparkle to your cards. I also like how you added a shaker to the front of the stenciled card. Thank you for sharing.
LikeLiked by 1 person
What amazing cards!!! I love them. Thank you for the detailed information on each card.
LikeLiked by 1 person
Thank you!
LikeLike
Love these! Love the stencils! HBD PPP!
LikeLiked by 1 person